

The Non Destructive Testing and Evaluation brings several methods to control structures and materials without destroying or degrading them, in order to characterize their integrity at different stages of their life cycle.
The guarantee of safety and durability of materials has become a major issue in many advanced industries. The Non-Destructive Testing and Evaluation business knows a strong growth in France and internationally: we invite you to enter a field full of future.
ULTRASONIC (UT)
Detecting, imaging and locating cracks using acoustic waves
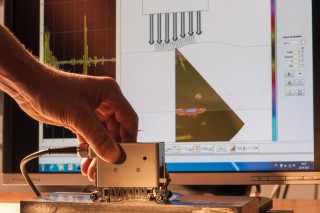
Ultrasonic acoustic methods allow us to determine mechanical elastic properties of materials without causing damage. They can also be used to detect potential flaws located near or far from the surface of materials or mechanical parts. Acoustic techniques are commonly used in strategic sectors such as aeronautics, medicine, nuclear industry, etc. and may assume a variety of guises.
RADIOGRAPHY (RT)
See into materials and detect defects using X-rays and gamma rays

Radiography using X or gamma rays is an NDT method using electromagnetic short-waves (X or gamma). This course aims to prepare students to apply these techniques in industrial settings and to understand physical models used to prepare and analyse measurements.
PENETRANT TESTING (PT)
Using fluid mechanics to detect defects in materials
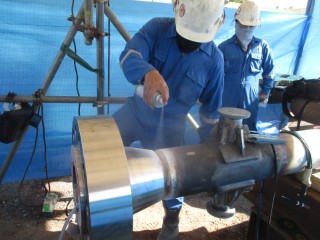
Penetrant testing is a materials control method that alllows surface flaws and inconsistencies detection. It is widely used in industry to guarantee reliability and safety in the operations of industrial equipment. This course aims to provide students with the necessary skills to apply this method to real-life situations.
MAGNETIC PARTICLE TESTING (MT)
Create a magnetic field to locate and image cracks

Magnetic Particle Testing is one of the earliest NDT methods used to detect and localise superficial surface flaws and discontinuities in materials in a reliable and quick manner. This method consists in exposing ferromagnetic materials to an external magnetic field in order to identify defects. This course aims to provide students with necessary skills to apply this method to real-life situations.
COURANTS CURRENT TESTING (ET)
Generate an electric current to detect defects in materials
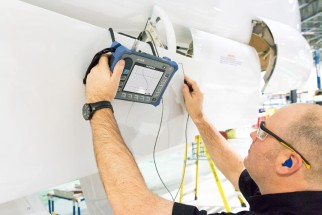
Eddy Current (ET) is a nondestructive technique (NDT) used in industry to make a specific control about the integrity, safety (defect-free) and the physical and dimensional features of metallic materials and related structures. The NDT-ET method contributes to the operational safety of equipment thanks to maintenance diagnostics in key industrial sectors (aeronautics, automobile, nuclear, metallurgy, etc...). It ensures the reliability of production machinery and that of products by dynamic in-situ testing. The method is widely used in aeronautic maintenance for both engine and mechanical structure. In the automotive industry, in-situ controls are performed by ET method during the production process of automotive components (hubs, brake drums, wheel axles). Other applications concern metallurgy industries, pipelines, petro-chemistry, etc...
The training provides theoretical teaching on the principles and applications of the NDT-ET method and experimental practice on different professional instrumentations with similar specifications to the ones available in the NDT laboratory or maintenance departments of industrial sites.
THERMOGRAPHY (TT)
Using infrared light to study materials
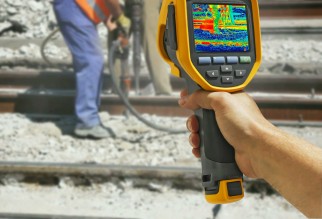
Thermography is a measurement technique used to determine from a distance the spatial repartition and the evolution over time of temperatures on an object. Its applications are numerous whether in building control, electrical infrastructures, or security. In order to obtain and process images in optimum conditions, it is important to acquire expert skills to use this method. The course aims to raise students’ awareness with regards to the advantages and the inherent difficulties of the method.
SHEAROGRAPHY (ST)
Visualising structural defects in materials using lasers
Shearography is an NDT optical method that provides global information (full-field) and does not need surface contact with the inspected structure. It can deliver a very precise insight into the actual behaviour of a mechanical assembly or of any other physical phenomenon without disturbing it. This technique is very effective to detect blind defects (bonding defects for example) and can also be applied to vibration analysis. In some cases, it can be used without any thermal constraints. During this course, students acquire the necessary skills to apply this method in the industrial sector.